The Skinny

How Dynamic Air Compression is Better than Compression Socks or Stockings
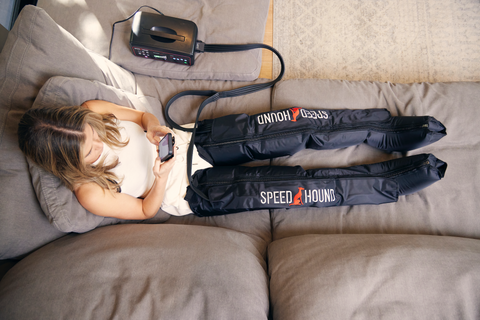
Regarding recovery and circulatory health, compression garments like socks and stockings have been staples for athletes, patients, and anyone looking to improve blood flow and reduce swelling. However, the advent of dynamic air compression technology is revolutionizing the way we approach these goals. Dynamic air compression, such as the Speed Hound ProPerformance Recovery System, offers superior benefits to traditional compression socks or stockings.
Superior Customization and Control
Compression Socks and Stockings
Compression socks and Compression stockings provide a fixed pressure level that is tightest at the ankle and gradually decreases up the leg. While effective, this one-size-fits-all approach can be limiting.
Dynamic Air Compression
The Speed Hound ProPerformance Recovery System allows you to customize the pressure levels to meet your specific needs. The system offers adjustable settings that allow you to control the intensity and duration of compression. Whether you need a gentle massage or deep tissue therapy, the ProPerformance Recovery System can be tailored to your requirements.
Comprehensive Coverage and Versatility
Compression Socks and Stockings
These garments primarily target the lower legs and feet. While they effectively improve circulation in these areas, they don’t address the entire leg or other body parts.
Dynamic Air Compression
Dynamic air compression boots, like those offered by Speed Hound, come with multiple attachments, including leg sleeves, Compression Sleeves for Arms, and a hip attachment. This allows for comprehensive coverage, ensuring that all major muscle groups receive the benefits of enhanced blood flow and faster recovery.
Enhanced Recovery Efficiency
Compression Socks and Stockings
These garments help prevent swelling and improve blood circulation, which can aid in recovery. However, the static pressure they provide is less effective for active muscle recovery.
Dynamic Air Compression
The Speed Hound ProPerformance Recovery System uses dynamic, cyclic pressure to mimic natural muscle contractions. This active compression promotes faster removal of metabolic waste products like lactic acid, significantly accelerating recovery times and reducing muscle soreness. It’s like having a professional massage therapist at your disposal anytime.
User-Friendly and Convenient
Compression Socks and Stockings
While easy to wear, compression socks and stockings can be uncomfortable over long periods, especially if they are too tight or not correctly fitted. They also require regular washing and careful maintenance to retain their effectiveness.
Dynamic Air Compression
The ProPerformance Recovery System is designed for maximum comfort and ease of use. You can quickly set up your preferred compression settings with an intuitive interface without hassle. Plus, the high-quality, durable materials ensure longevity and easy maintenance. Slip on the attachments, set your preferences, and relax while the system works.
Versatility for Various Needs
Compression Socks and Stockings
Compression socks and stockings are ideal for daily wear, long flights, and sedentary jobs. However, they are limited to specific scenarios.
Dynamic Air Compression
Dynamic air compression systems are versatile enough for various applications, from athletic recovery to post-surgical rehabilitation. Whether you’re an elite athlete, a fitness enthusiast, or someone recovering from an injury, the Speed Hound ProPerformance Recovery System adapts to meet your needs, offering tailored therapy sessions that fit seamlessly into your routine.
ConclusionWhile compression socks and stockings have their place in supporting circulatory health and bare recovery, dynamic air compression systems like the Speed Hound ProPerformance Recovery System take recovery to the next level. With superior customization, comprehensive coverage, enhanced recovery efficiency, user-friendly design, and unmatched versatility, dynamic air compression offers a holistic solution for anyone serious about their health and performance. Upgrade your recovery routine today and experience the difference that dynamic air compression can make.
A Complete Guide to Hyrox Training To Unlocking Your Potential
Welcome to the world of Hyrox, a fitness revolution sweeping the globe. If you're reading this, you’re likely curious about how to begin or perhaps looking to sharpen your skills for this new challenge. This guide is your starting block to mastering Hyrox training, where fitness meets endurance, and every competitor finds new limits to surpass.
What is Hyrox Training?
Hyrox is not just another fitness trend; it’s a lifestyle. This competition melds intensive functional exercises with endurance running, creating a diverse challenge for participants of all levels. Athletes compete in eight distinct workout stations interspersed with running tracks, pushing their physical and mental boundaries.
The Workstations of Hyrox
Hyrox isn't just a race; it's a test of endurance and skill across various functional exercises. Before we explore each station, let's understand what these workstations are. In a Hyrox event, competitors face a series of eight different workout stations, each designed to challenge various aspects of fitness, such as strength, stamina, agility, and power. These stations are interspersed with running segments, creating a dynamic flow that pushes athletes to their limits. Here's a closer look at what these challenging stations entail and how they fit into the overall Hyrox competition.

BUY PERFORMANCE RECOVERY SYSTEM
Understanding each station is crucial for any Hyrox competitor. Here’s what you’ll need to do in this order
Skierg 1000 meters: The first station simulates the movement of cross-country Skierg for 1000 meters, which is fantastic for upper body and core conditioning.
Sled Push and Sled Pull: Test your strength and grit as you push a heavy sled down a 50-meter track, then pull it back towards you.
Burpee Broad Jumps: A full-body exercise that will spike your heart rate and challenge your endurance.

Sandbag Lunges will target your lower body strength and stability as you move across a set distance.
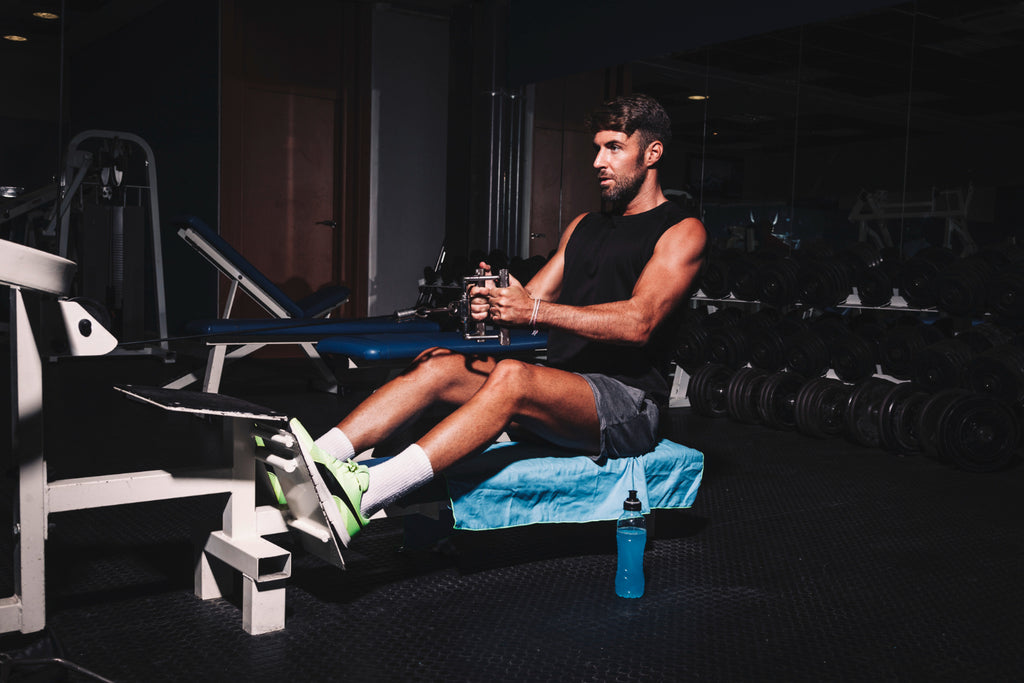
Rowing 1000 meters: A classic test of endurance and power, perfect for building cardiovascular fitness.
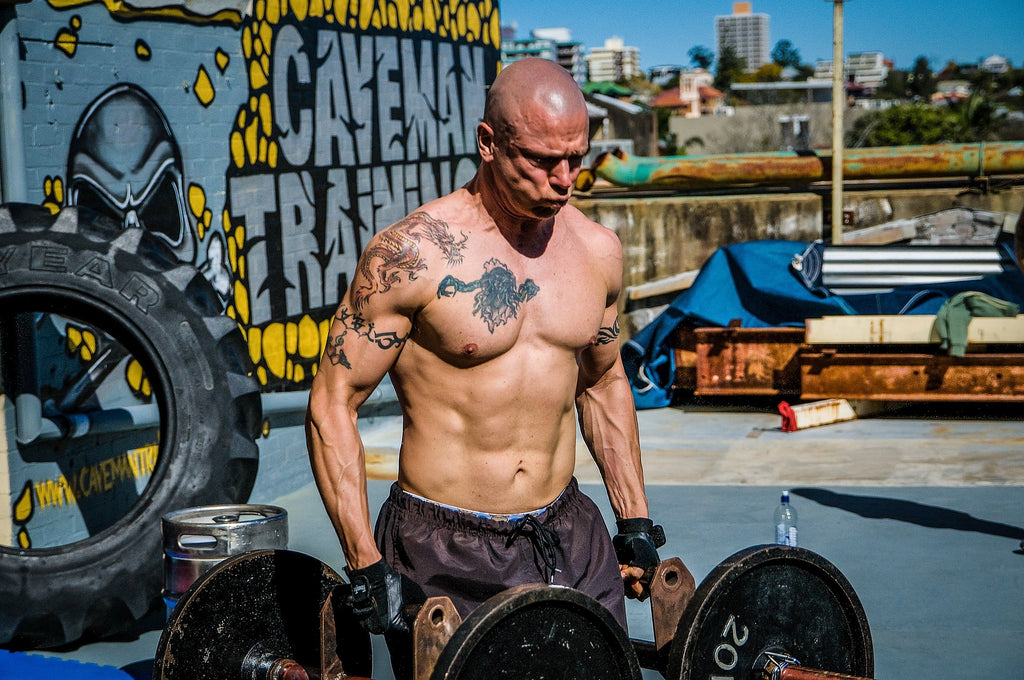
200-metre Farmers Carry: This grip strength test is as straightforward as brutal.
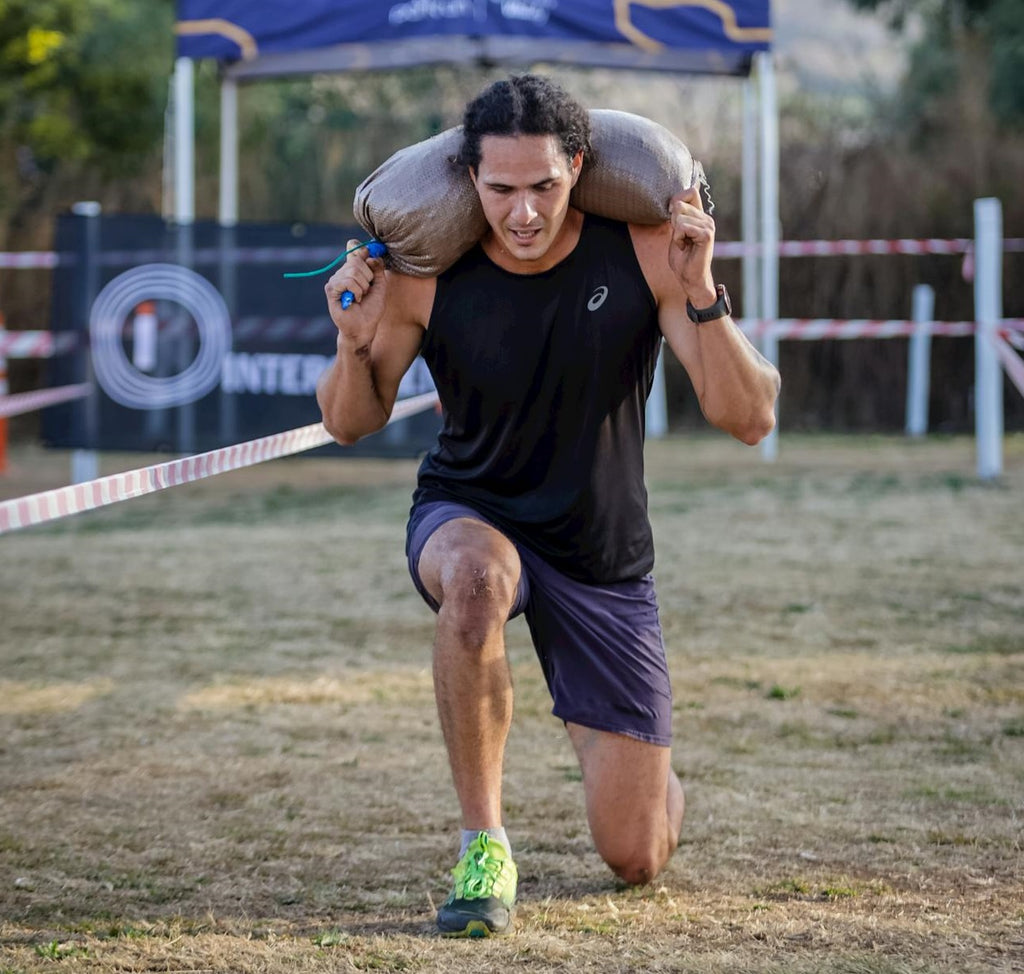
100-meter Sandbag Lunges: This is a surprisingly challenging station that involves making lunges while carrying 10, 20, or 30 kg on your back, which will challenge your thighs and glutes.
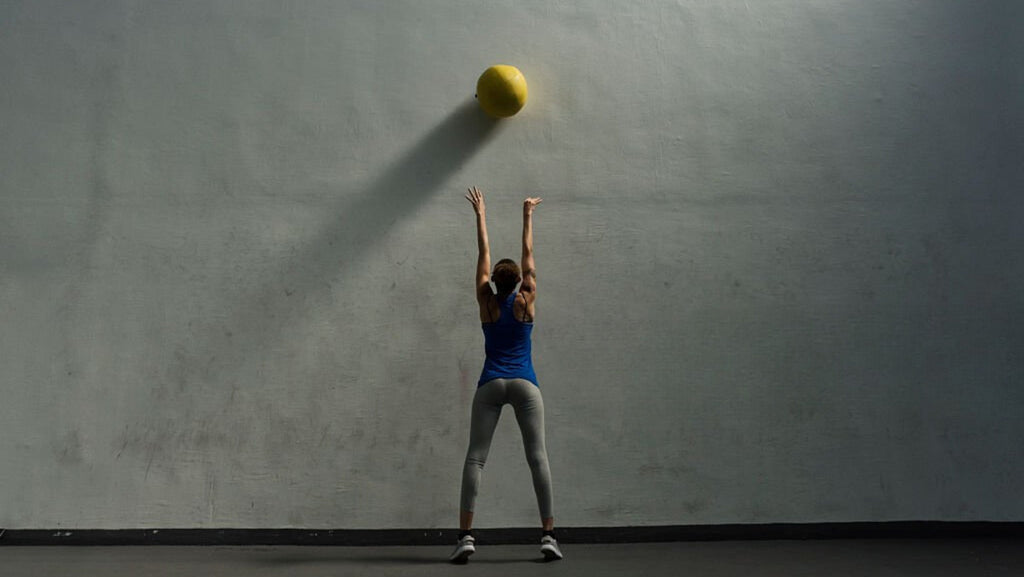
75/100 Wall Balls: Aim, throw, squat, repeat. Excellent for coordination and aerobic capacity.
Training Tips for Hyrox
Preparing for a Hyrox competition demands a unique approach to training. That isn’t just about hitting the gym or clocking miles; it’s about crafting a fitness regimen that mirrors the intensity and diversity of the event itself. Here are some tailored tips to help you not only meet but exceed the demands of Hyrox training:
- Build a Balanced Foundation: A successful Hyrox athlete requires a strong foundation of strength and endurance. Your training should include:
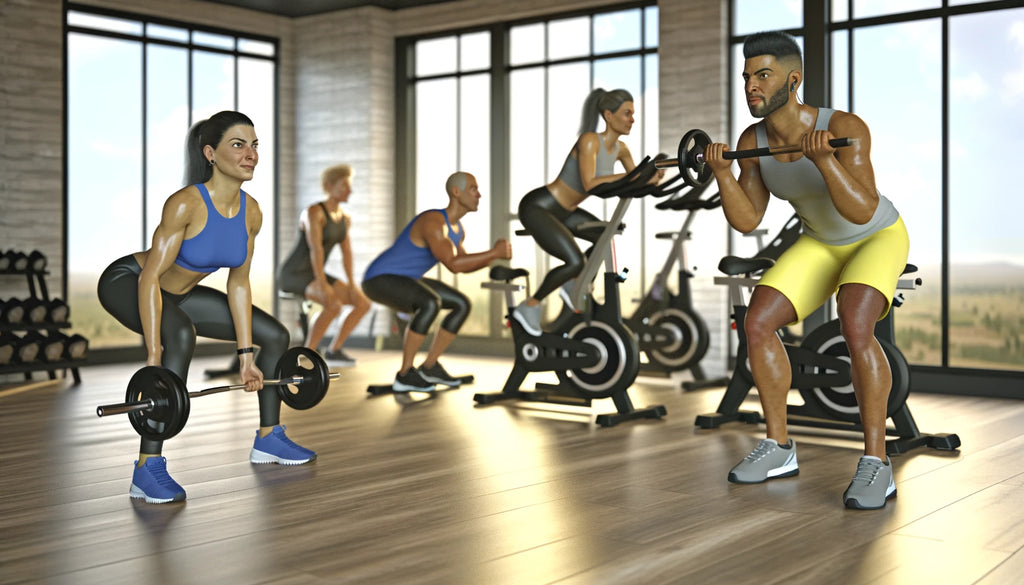
- Strength Training: Focus on compound movements like squats, deadlifts, and presses. These movements engage multiple muscle groups, enhancing overall strength and power.
- Endurance Training: Incorporate various forms of cardio, such as running, cycling, or rowing, to build cardiovascular endurance. Since Hyrox involves consecutive running segments, endurance training is crucial.
- Functional Fitness is Key: Hyrox competitions involve movements that mimic everyday activities. Incorporate functional fitness into your routine with exercises like kettlebell swings, sandbag carries, and sled pushes. These exercises improve your ability to perform under fatigue and develop muscle memory for your specific challenges.
- High-Intensity Interval Training (HIIT): This type of training is perfect for Hyrox because it improves aerobic and anaerobic fitness. Short bursts of high-intensity exercise followed by brief recovery periods will prepare you for the stop-start nature of moving between running and functional stations in Hyrox.
- Practice Sport-Specific Drills: Since you know the types of stations in Hyrox, tailor your workouts to practice these specific exercises. If possible, set up mock stations to get used to transitioning between different types of physical activities, which is a critical component of the competition.
- Recovery as Part of Training: Integrating active recovery days into your training plan is essential. These days, you can use light exercise, stretching, and recovery tools like the Speed Hound PRO PERFORMANCE RECOVERY BOOTS to enhance muscle recovery and prepare for the next intense workout.
- Simulate Race Conditions: Occasionally, simulate the race conditions. That could mean performing a mini-Hyrox competition for yourself, going through exercises in the same order as you would during the event, and trying to mimic the pacing and intensity.
- Mental Preparation: Hyrox is as much a mental challenge as a physical one. Practice visualization techniques and set mental goals alongside physical ones. Building mental resilience will help you push through when competition gets tough.

Role of Recovery in Hyrox Training and How to Recover
Recovery in Hyrox training isn't just about taking a day off. It involves active steps to ensure your muscles repair themselves and grow stronger. That includes managing inflammation, flushing out toxins, and replenishing energy stores. It's all about giving your body what it needs to repair the microscopic damage inflicted during those intense workout sessions.
Techniques for Enhanced Recovery: Implementing a mix of both passive and active recovery methods can significantly boost your recovery:
- Active Recovery: Engaging in low-intensity activities that maintain blood flow—like walking or gentle stretching—helps alleviate muscle stiffness and promotes healing.
- Sleep: Quality sleep is a recovery powerhouse, fostering physical muscle repair and mental health.
- Nutrition: Optimal post-workout nutrition speeds recovery, with proteins aiding muscle repair, carbohydrates replenishing energy reserves, and fats helping reduce inflammation.
- Hydration: Adequate fluid intake is essential for optimal systemic function, including cardiovascular health and muscle function.
BUY PERFORMANCE RECOVERY SYSTEM
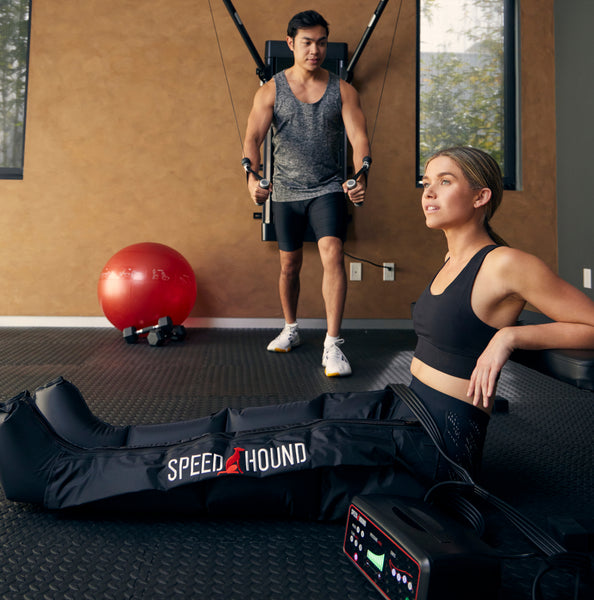
Speed Hound PRO PERFORMANCE Recovery System: Tailored for athletes engaged in demanding sports like Hyrox, this recovery system is a game-changer. It delivers dynamic air pressure that massages your legs, significantly enhancing circulation and speeding up the removal of metabolic waste accumulated during strenuous activities. The benefits are manifold:
- Immediate Relief: It provides instant relief to tired legs and sore feet, whether from long training sessions, standing all day, or intense sports activities.
- Reduce Pain and Soreness: Regular use helps decrease general discomfort and targeted soreness, allowing quicker recovery.
- Decrease Muscle Fatigue: By alleviating muscle fatigue, you can maintain a higher level of performance for your next training or competitive event.
- Reduce Swelling: Effective in reducing swelling by enhancing blood flow and fluid movement within the limbs.
- Increase Range of Motion: Consistent use facilitates enhanced flexibility and range of motion, which helps prevent injuries.
BUY NOW
Integrating the Recovery System into Your Routine: Incorporating the Speed Hound recovery system into your daily routine can be seamless. Just 30 minutes of use post-training can significantly refresh your muscles. This downtime is not just physically recuperative—it's also a mental pause, allowing you to relax and reset, thoroughly preparing you for the next day’s challenges.
Recovery is just as critical as training in the challenging environment of Hyrox competitions. By embracing comprehensive recovery techniques and incorporating the Speed Hound PRO PERFORMANCE RECOVERY SYSTEM, you're not merely recovering but preparing for every subsequent workout and competition. Remember, success in Hyrox doesn’t just come from how hard you train and how effectively you recover.
Conclusion
Hyrox training is demanding, rewarding, and, most importantly, transformative. Whether you're a seasoned athlete or a newcomer, the key to success lies in consistent training, strategic pacing, and comprehensive recovery. Remember, with every drop of sweat and every breath you take, you're not just training for a competition; you're training for life.

Strategies to Increase Functional Threshold Power (FTP) For Cyclists
Hey there, speed enthusiasts! Today, we’re diving into cycling performance, focusing on a crucial aspect—Functional Threshold Power, or FTP. Whether you’re prepping for a race or just looking to beat your personal best, boosting your FTP can make a significant difference. So, buckle up as we explore tried-and-tested strategies to help you ramp up your FTP and elevate your cycling game.
Understanding FTP
Functional Threshold Power is the maximum power you can sustain for an hour. It's like finding out how fast you can go without burning out too quickly—it's essential for endurance. Cyclists measure FTP through tests like the 20-minute effort or the ramp test, where sustained effort reveals how much power you can handle. Understanding your FTP helps tailor your training, pushing your limits just right.
Fundamental Training Principles
Consistency is your best friend here. Regular training sessions, without skipping, gradually enhance your FTP. But it’s not just about hard riding; recovery plays a massive role. It’s crucial to balance intense sessions with adequate rest—this is where real growth happens. Training with a plan that varies in intensity ensures you're not just working hard but also working smart.
Specific Training Workouts to Increase FTP
Interval Training
Interval training is essential for increasing your Functional Threshold Power (FTP), the maximum power you can sustain over an hour of cycling. This training style involves short bursts of intense effort followed by recovery periods. Here are some specific types of interval training:
- VO2 Max Intervals: These intervals are typically short (2-5 minutes) and are performed at a very high intensity. The goal is to push your cardiovascular system to its limits, increasing the maximum amount of oxygen your body can use during exercise.
- Sweet Spot Training: This involves intervals slightly below your FTP, around 88-94% of your FTP. These intervals are longer (typically 10-20 minutes) and help build endurance and power at the same time.
- Threshold Intervals: These are done at or above your FTP (95-105% of FTP) for 5-20 minutes. They are crucial for increasing the power you can sustain over an hour, directly targeting the improvement of FTP.
Endurance Rides

Endurance rides are long, steady efforts fundamental to building a robust aerobic base. These rides typically last several hours and are done at a moderate intensity, usually around 56-75% of your FTP. The benefits of endurance rides include:
- Improved Aerobic Capacity: Longer rides increase the efficiency of your heart and lungs, which is crucial for long-term cycling performance.
- Enhanced Fat Utilization: These rides help your body become more efficient at burning fat as a fuel source, preserving glycogen stores for higher-intensity efforts.
- Muscular Endurance: Riding for several hours increases the resistance of your leg muscles to fatigue, which is essential for maintaining a high power output over more extended periods.
High-Intensity Interval Training (HIIT)

HIIT consists of concise, intense efforts followed by brief recovery periods. These are akin to the sprints in cycling training and are critical for increasing peak power output. The structure of a typical HIIT session might include:
- Short, Intense Bursts: These usually last from 30 seconds to a few minutes, with the intensity reaching near maximum effort.
- Quick Recovery: Recovery periods are often equal to or shorter than the effort periods, allowing enough time to recover before the next burst.
- Enhanced Metabolic Response: HIIT significantly improves metabolic flexibility, enabling your body to switch efficiently between different energy systems, which is beneficial for short- and sustained efforts.
Integrating these specific workouts into your training regimen can significantly enhance your FTP and overall cycling performance. Each type of workout targets different aspects of cycling fitness, and together, they provide a comprehensive approach to improving your power and endurance on the bike.
Equipment and Technology
Choosing the right gear, like a reliable bike and appropriate accessories, can make a significant difference. Moreover, incorporating technology such as power meters helps track your performance meticulously. You can use Compression Recovery Boots for post-ride recovery. They help reduce muscle fatigue and get you back on the bike faster, contributing significantly to your training regime and performance improvements.
Post-Workout Recovery
After a grueling ride, your muscles must recover to prevent DOMS (Delayed Onset Muscle Soreness), which can hinder your training schedule. Compression Recovery Boots can help alleviate the soreness by increasing blood flow and reducing lactic acid build-up. This targeted muscle relaxation and recovery approach can drastically reduce recovery time, enabling more consistent training.

BUY NOW
Incorporating such advanced equipment into your training boosts your performance and ensures you are training smarter. With consistent use, you can see significant improvements in your FTP, making every pedal stroke count towards achieving your cycling goals.
Using technology strategically, such as with the Compression Boots, translates to quicker recovery, more productive training sessions, and a higher FTP. Remember, in the pursuit of increasing your FTP, every small advantage you harness empowers you!
Nutrition and Hydration
Fueling your body correctly is non-negotiable. Carbohydrates are your primary fuel during rides, so take your time with them. Staying hydrated is equally important, as even a 2% drop in body water can reduce performance. Pre-ride, during, and post-ride nutrition uniquely affects your training effectiveness and recovery.
Mental Strategies
Mental grit drives physical performance. Setting clear, achievable goals and monitoring your progress can keep motivation high. Mental resilience helps you push through when your body screams to stop, a crucial factor in FTP improvement.
Recovery Techniques
Recovery isn't just downtime. Active recovery, quality sleep, and even massages contribute to muscle repair and prepare you for the next challenge. Effective recovery directly influences your ability to train harder and improve FTP.
ConclusionIncreasing your FTP is a multifaceted approach involving detailed training, precise nutrition, smart use of technology, mental toughness, and thorough recovery. By embracing these strategies, you're not just spinning wheels; you're gearing up for measurable improvements.

Strength Training for Marathon Runners: The Key to Improved Performance
Hello, marathon enthusiasts! If you've ever wondered how to step up your running game, strength training might be your missing secret ingredient. It's not just about logging miles; it's about preparing your body to handle them better than ever. Let's dive into how integrating strength training can transform your marathon performance from good to outstanding.
Understanding the Importance of Strength Training for Marathon Runners
Think strength training is just for sprinters or bodybuilders? Think again. For marathon runners, it's a core element of success. Integrating strength workouts into your routine bolsters muscle efficiency and stamina, allowing you to maintain pace without tiring quickly. Moreover, it's your best defense against injuries. By strengthening muscles and joints, you're less likely to face those everyday runner's woes like IT band syndrome or runner's knee.
Key Strength Training Exercises for Marathon Runners
So, what kind of strength training should runners focus on? Here’s a quick guide:
Squats: Squats are the ultimate exercise for developing lower body strength, which is crucial for the power phase of your running stride. They target the quadriceps, hamstrings, glutes, and calves—vital for maintaining speed and endurance over long distances.

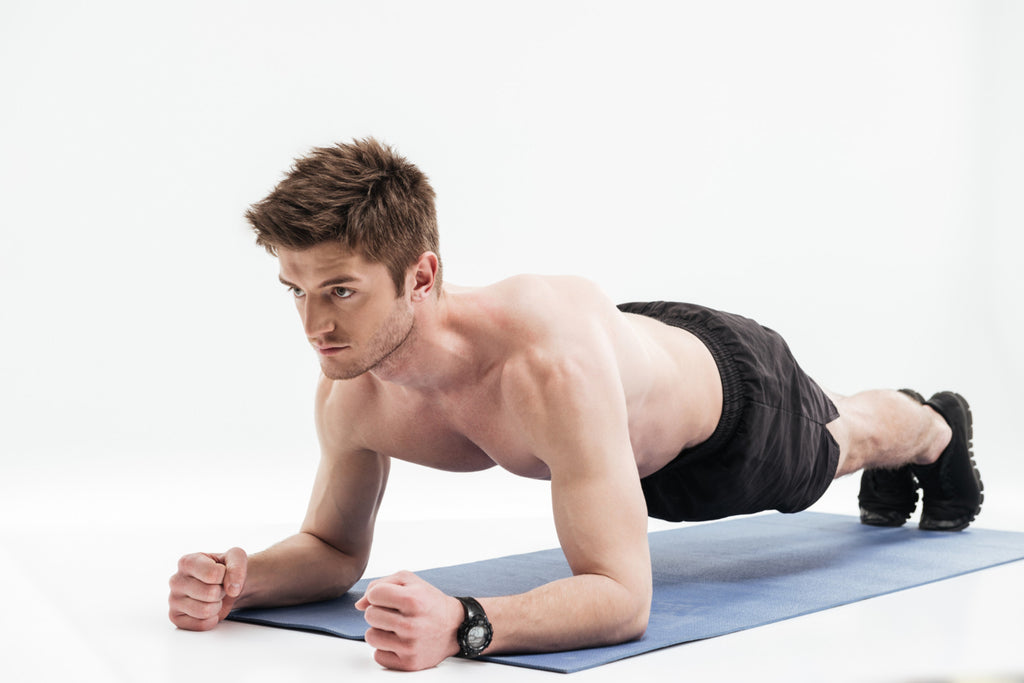
Planks: Why They're Essential: A strong core stabilizes your entire body, improving your running form and efficiency. Planks are excellent for building endurance in the abdominal muscles and supporting the spine.
Lunges: Why They're Essential: Lunges mimic the running motion, enhancing the strength and balance of your running gait. They specifically strengthen the hips, glutes, and thighs while improving flexibility.

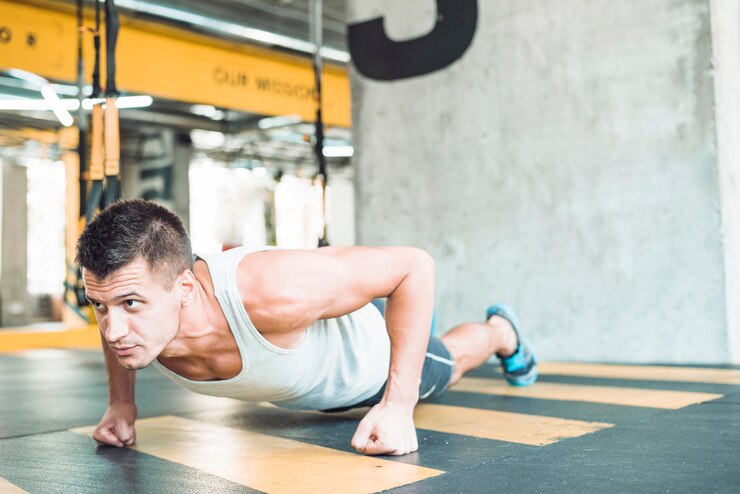
Push-ups or Bench Presses: Upper body strength is crucial for maintaining good running posture and balance. Push-ups build the chest, shoulders, and triceps, while bench presses allow heavier lifting to increase upper body strength significantly.
Deadlifts: Why They're Essential: Often overlooked by runners, deadlifts are powerful for developing the posterior chain, which includes the hamstrings, glutes, and lower back. Strong posterior muscles are vital to propelling runners forward and maintaining upright posture.
Each exercise should be performed with attention to form to maximize benefits and minimize injury risks. Incorporating these strength-training exercises into your routine will significantly enhance muscle strength, endurance, and overall marathon performance.
Enhancing Recovery with Recovery Boots
Recovery becomes paramount after pushing your limits with running and strength training. That's where compression recovery boots, like those offered by Speed Hound, come into play. These aren't just fancy leg sleeves; they're a revolution in recovery technology. Using them after your workouts reduces muscle soreness and speed up recovery times significantly, making it easier to hit your training days harder and with better results.
Reducing Swelling and Enhancing Blood Circulation
Benefits: After long-distance running or strength training, legs can swell and feel heavy. The Recovery System uses compression to help reduce swelling by enhancing blood flow and lymphatic drainage. This helps in faster recovery and improves overall circulation, which is crucial for marathon runners and active individuals.
Immediate Relief from Fatigue and Soreness
How It Helps: The system offers dynamic air pressure that functions like a deep tissue massage. It targets tired legs and sore feet, providing immediate relief after long runs, intense workouts, or simply after a day spent on your feet. This massage helps to rapidly decrease muscle fatigue and reduce pain and soreness, allowing you to recover quicker and more effectively.
Increased Range of Motion and Flexibility
Impact on Performance: Regular use of the Recovery System can increase the range of motion. This is particularly beneficial for runners who need to maintain flexibility and muscle elasticity to perform optimally and reduce the risk of injuries..
How to Integrate Strength Training into Your Marathon Training Schedule
Balancing running with strength training can seem daunting, but it's all about the schedule. Aim for 2-3 strength training sessions per week, preferably on days you're not doing your longest runs. As your race nears, taper down the strength intensity to keep your legs fresh for race day. Here's a tip: follow up with a strength session after a light run, then rest or do a very gentle run the next day.
Addressing Common Concerns and Misconceptions
Let's clear up some myths:
- Bulking up: Many runners fear strength training will make them bulky. The truth? Runners won't bulk up like bodybuilders; instead, they develop lean, efficient muscle mass perfect for endurance.
- Time-consuming: Adding strength training means more time working out, but it's an investment. Less time injured and more efficient running equals faster race times.
Conclusion
Incorporating strength training into your marathon regimen isn’t just a good idea; it’s a game-changer. It boosts your performance, fortifies your body against injuries, and, paired with advanced recovery methods like recovery boots, keeps you training consistently at your best.

Different Types of Treatments for Lymphedema
Welcome to our latest blog post on "Different Types of Treatments for Lymphedema," where we delve into practical strategies to manage this misunderstood condition.
What Is Lymphedema?
Lymphedema is a chronic condition that occurs when the lymphatic system is impaired and unable to adequately drain lymph fluid, typically from the arms or legs. This impairment can be due to genetic factors, surgery, radiation therapy, or infection, leading to swelling and a range of other physical symptoms.
What Are the Most Common Symptoms of Lymphedema?
Recognizing the symptoms of lymphedema early can be crucial for effective management. Common symptoms include swelling in part of the body—usually in one or more of your arms or legs. A feeling of heaviness or tightness may accompany this swelling, restricted range of motion, recurring infections, and changes in the texture or appearance of the skin, such as thickening.
What Are the Best Treatments for Lymphedema?
Compression Garments
Compression garments are essential in managing lymphedema. They apply steady pressure to the affected area, supporting the flow of lymph fluids back towards the body's trunk. This helps prevent the fluid from accumulating further, which can worsen swelling. These garments must be well-fitted and worn as a healthcare professional directs to ensure they are practical and comfortable. Regular replacements are also necessary to maintain the correct compression level, as the garments can lose elasticity over time.
Compression Devices

For those experiencing lymphedema, pneumatic compression devices offer a sophisticated and effective treatment option. Devices like the Speed Hound ProPerformance Recovery System use controlled, dynamic air pressure to massage the limbs, enhancing lymph fluid movement and alleviating symptoms of swelling and discomfort. This is one of the best treatments for Lymphedema as it is also FDIA approved. This system is exceptionally user-friendly, featuring an intuitive interface with all controls at your fingertips, allowing for personalized settings without the need for complicated setups like apps or Bluetooth. Whether after a long day or post-workout, this recovery system provides targeted therapy that can be adjusted to meet individual needs, ensuring comfort and effectiveness in treating lymphedema.
Exercise
Exercise is critical in lymphedema management as it promotes fluid circulation and enhances overall well-being. The key is to engage in low-impact, gentle exercises that involve the affected limbs. Activities like walking, swimming, light aerobics, and specifically designed lymphedema exercises can help maintain fluid movement without overstraining the lymphatic system. These exercises should be performed under the guidance of a physical therapist specializing in lymphedema to avoid potential complications.
Massage Therapy

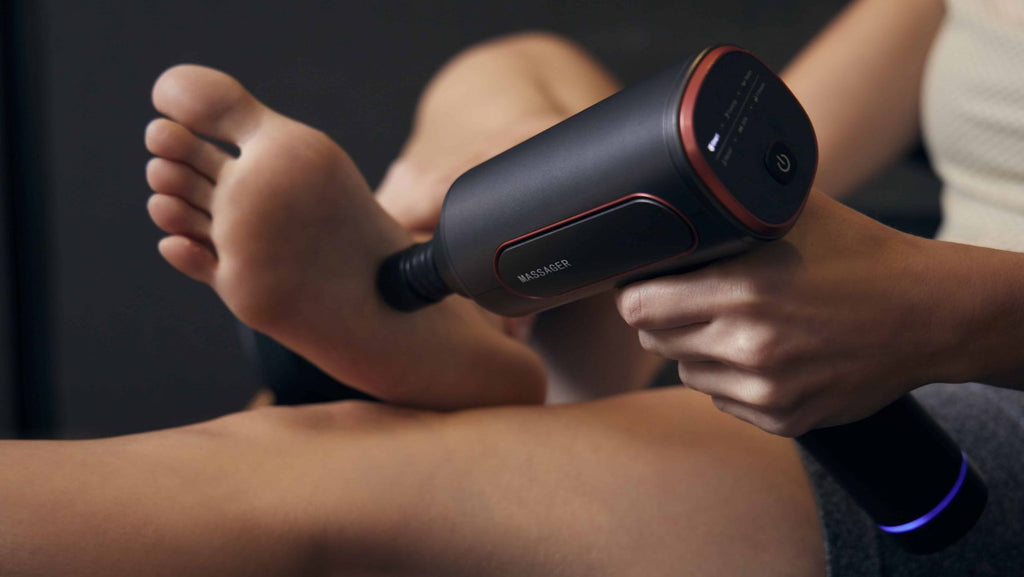
In addition to manual lymph drainage, incorporating tools such as the Speed Hound Pro Percussion Gun can significantly enhance your lymphedema management routine. This advanced percussion gun delivers deep tissue stimulation, helping relieve muscle tightness and improve circulation. With six different attachments and speeds, it allows for a highly customizable experience that complements the effects of manual massage. Ideal for activating muscles before exercise or helping them recover afterward, the Pro Percussion Massage Gun is an excellent complement to more traditional lymphedema treatments, offering a convenient and effective way to manage symptoms at home.
Weight Loss
If applicable, weight management can be highly beneficial for lymphedema patients. Excess body fat can impede the efficient function of the lymphatic system, exacerbating symptoms. A balanced diet and regular exercise tailored to lymphedema management can aid in weight loss and reduce the severity of the condition.
Conclusion
Incorporating these treatments into a daily routine can greatly improve the quality of life for those with lymphedema. Patients should work closely with healthcare providers to create a treatment plan that best suits their individual conditions. Regular monitoring and adjustments to the plan can help manage this chronic condition effectively, allowing patients to enjoy more active and less restricted lives.

Speed Hound vs. Air Relax: Which Compression Boots Lead the Race in 2024?
Compression boots have emerged as a cornerstone for athletes and active individuals in an era where technology meets wellness. They're not just a luxury; they've become necessary for optimizing recovery and performance. Among the plethora of options, Speed Hound and Air Relax stand out. But the question remains: which is genuinely ahead of 2024? Let's unpack this comparison with a detailed look into both brands, dissecting their offerings to see how Speed Hound might be edging out Air Relax in this closely contested race.
Introduction to Compression Technology
Compression therapy has revolutionized the way we approach recovery. By enhancing blood circulation and speeding up the removal of lactic acid, these systems promise to get you back on your feet faster than ever. However, not all compression boots are created equal. In this comparison, we dive into what makes Speed Hound and Air Relax distinct and, importantly, which might offer you the edge in your recovery regimen.
Unveiling the Competitors
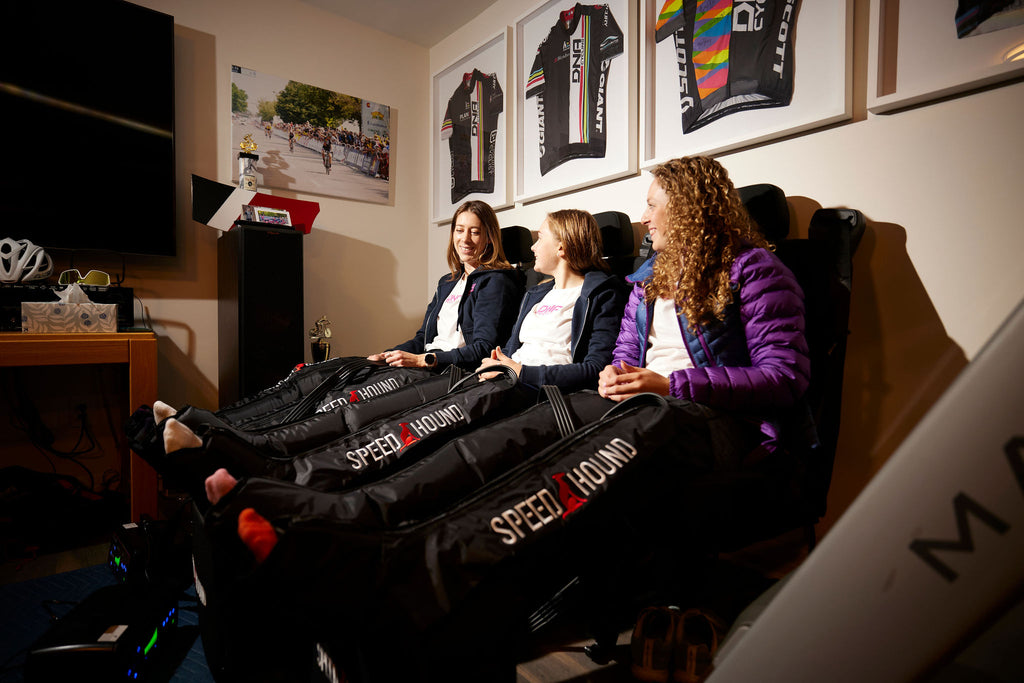
Speed Hound's ProPerformance Recovery System
At its core, Speed Hound is designed for the relentless, the tireless, and the ambitious. It's for those who chase dawn and race the sunset. With a commitment to actual results – offering fresher legs within 30 minutes or a money-back guarantee – Speed Hound doesn't just sell a product but a promise.
Air Relax's PRO AR-4.0 Leg Recovery System
Air Relax brings a legacy of over a decade in compression technology. The PRO AR-4.0 system is their flagbearer, boasting high-quality parts and a dedication to reliability. With a foundation in medical device manufacturing, Air Relax aims to blend comfort with performance.
The Technology Face-off
The race heats up when we drill down into the technology and features. Air Relax showcases its prowess with a touchscreen interface and a medically graded pump, making it a powerhouse in its own right. However, Speed Hound takes customization to the next level. Adjustable pressures from 20mmHg to 200mmHg, toggles for specific leg areas, and varied modes like flush and massage ensure that every user finds their perfect recovery setting. This bespoke approach to recovery is where Speed Hound starts to pull ahead.
User Experience: A Close Contest
Both brands pride themselves on their ease of use. Air Relax's intuitive LCD and straightforward operation cycle appeal to users who value simplicity and power. Yet, Speed Hound's approach, emphasizing both ease of use and deep customization, allows for a more personalized recovery experience.This attention to individual user needs gives Speed Hound an edge in the ease-of-use department.
Evaluating Effectiveness
The ultimate measure of any recovery system is its effectiveness. Air Relax's benefits are clear, from improved blood circulation to reduced muscle fatigue. However, Speed Hound's ability to tailor the recovery experience to the user's specific needs, adjusting pressure and targeting different parts of the leg, offers a nuanced approach to effectiveness that can be felt in the muscles and seen in the recovery times.
Support and Assurance
In the world of high-tech recovery, support and warranty are paramount. Air Relax offers a solid 1-year warranty, standing firmly behind its product. Speed Hound, however, elevates this with a 2-year protection plan and a bold 60-day happiness guarantee. This level of confidence in its product, combined with a customer-centric return and exchange policy, underscores Speed Hound’s commitment to its users’ satisfaction and trust.
Affordability and Accessibility
Price plays a pivotal role in decision-making. With Speed Hound priced at $699 and offering interest-free installments, it positions itself as an investment in your recovery and an accessible option for a wider audience. While providing premium features, Air Relax comes at a higher price of $995. This difference could be a deciding factor for many, making Speed Hound a more appealing choice for those looking for quality and value.
The Finish Line
While both brands offer impressive features and dedicated followings, Speed Hound inches ahead, focusing on customization, user experience, and value for money. In the 2024 race for the best compression boot, Speed Hound is not just competing; it's setting the pace.
Join the Speed Hound Pack
Discover how Speed Hound can transform your recovery process and elevate your performance. Explore the ProPerformance Recovery System on our website, and remember, with Speed Hound, you're not just investing in a product. You're investing in your recovery, performance, and future victories. Let Speed Hound be your partner in your journey to peak performance.
Compression recovery boots have emerged as a cornerstone for athletes and active individuals in an era where technology meets wellness. They're not just a luxury; they've become necessary for optimizing recovery and performance. Among the plethora of options, Speed Hound and Air Relax stand out. But the question remains: which is genuinely ahead of 2024? Let's unpack this comparison with a detailed look into both brands, dissecting their offerings to see how Speed Hound might be edging out Air Relax in this closely contested race.

The Best Recovery Tools for Runners in 2024
Welcome to the ultimate guide for runners in 2024, where we delve into the best recovery tools designed to rejuvenate your body and mind after those grueling miles. Whether you're a seasoned marathoner or a casual jogger, finding the right recovery aids can significantly enhance your performance and overall wellbeing. From innovative solutions for your back, hips, and legs to targeted devices for specific muscle relief and essential practices for mental rejuvenation, this blog offers a curated selection of tools and techniques. Each recommendation is crafted to support key areas affected by running, ensuring you can continue to push your limits while maintaining optimal health. Dive in to discover how you can elevate your recovery process and keep your running journey smooth and enjoyable.
For your back - Chirp Wheel
Ensuring your back's health is paramount for performance and recovery. Enter the Chirp Wheel, a standout tool in the runner's recovery arsenal for 2024. Designed with precision to align with the natural curvature of your spine, this innovative wheel offers a deep, soothing massage to relieve the tension that accumulates after miles on the track. Its ergonomic design ensures targeted pressure on the muscles surrounding the spine, effectively easing discomfort and enhancing flexibility. Not just for recovery, incorporating the Chirp Wheel into your routine can also improve posture and prevent common running-related back issues. It's a simple yet profoundly effective solution, making it a must-have for runners who value their back's health and overall wellbeing. So, roll your way to a stronger, more resilient back with the Chirp Wheel, and keep your running journey smooth and enjoyable.
For your Hip Muscles and Legs - Speed Hound Leg Systems and Hip Attachment Option
For runners, the hips and legs aren't just vital components of their sport; they're the very foundation of every stride, every hill conquered, and every finish line crossed. Recognizing this, the Speed Hound Leg Systems and Hip Attachment Option emerges as a groundbreaking solution for 2024, dedicated to the recovery and upkeep of these critical areas.
Created from durable, easy-to-clean nylon, this system is not just about recovery; it's about empowering your performance. With the capability to warm up or cool down your hip and core muscles efficiently, it ensures that you're always in the best shape to tackle your running goals. Whether you've pushed through a grueling marathon or spent long hours on your feet, the Speed Hound offers real recovery in as little as 30 minutes.
But why do you need it? The answer lies in its ability to transform how you feel daily. This world-class recovery system travels with you, offering unparalleled relief wherever and whenever you need it. By integrating the Speed Hound into your routine, you not only enhance your physical wellbeing but also elevate your running experience to new heights. It's not just a tool; it's your companion on the journey to peak performance and beyond.
For Targeted Areas - Speed Hound Percussion Gun
Runners are constantly on the lookout for tools that genuinely make a difference for targeted areas - enter the concept of percussion therapy, particularly through devices like the Speed Hound Pro Percussion Gun. This device isn't just about the buzz; it's grounded in the principle of targeted muscle relief. It employs percussion therapy to help loosen tight muscles, thereby aiding in both pre-workout activation and post-workout recovery.
What sets the Speed Hound Pro apart is its versatility. With six different attachments, each designed for specific areas of the body, and six-speed settings, it allows for a highly personalized approach to muscle recovery. This level of customization ensures that whether you're dealing with a stubborn knot in your shoulder or seeking to soothe your calves after a long run, there's an option that fits.
While the initial cost might seem significant, considering the device as an investment in your running journey paints a different picture. The convenience of having a tool that offers immediate relief and the potential to reduce the frequency of professional massage therapy sessions can be financially beneficial in the long run. It's a practical addition to a runner's recovery toolkit, offering a blend of convenience and effectiveness for managing muscle soreness and improving overall muscle health.
For Hard to Reach trigger points - Thera cane Massager.
Discover the Thera Cane Massager, a game-changer for runners tackling those elusive, hard-to-reach trigger points. It's no secret that the repetitive nature of running can lead to tight spots that seem almost impossible to soothe. That's where the Thera Cane steps in, acting as an extension of your own hands to apply precise pressure exactly where it's needed.
Designed with an intuitive, user-friendly shape, this tool allows you to leverage its structure to target deep-seated knots without the need for a masseuse. Its genius lies in its simplicity; the Thera Cane empowers you to manage your recovery process independently, ensuring that no muscle is left unattended. Perfect for the runner who values thoroughness and efficiency in their recovery routine, the Thera Cane is a straightforward, effective solution to keep your body responsive, flexible, and ready for the next challenge.
For Walking Around - Oofos Slides
After a long run, the simple act of walking can feel like a Herculean task. Enter Oofos Slides: the unsung hero for weary feet in 2024. These aren't your ordinary slides; designed with a runner's recovery in mind, they feature a footbed that cradles and supports your arches, providing instant relief from the ground up.
What sets Oofos apart is their OOfoam technology, which absorbs 37% more impact than traditional footwear materials, reducing stress on sore feet, knees, and back. That means every step taken post-run feels lighter and more comfortable, accelerating recovery by allowing your body to relax and heal more effectively.
Ideal for those moments when you're moving around at home or stepping out for errands, Oofos Slides offers a blend of comfort and support that's hard to beat. They're a simple yet essential addition to any runner's arsenal, making the transition from high-impact activity to rest seamless and soothing.
For your Mind - Sleep
Where physical endurance is often spotlighted, the power of sleep for mental recovery takes a silent, yet pivotal, stance. Sleep isn't just a pause in our day; it's the ultimate rejuvenation session for your mind. It's where the magic of recovery happens, not just for your body but crucially for your mental resilience and clarity.
Quality sleep acts as a reset button, offering your mind the break it needs to process the day's stress, consolidate memory, and rejuvenate for the challenges ahead. For runners, this means improved focus, better decision-making on and off the track, and a more positive mindset towards training and competition.
Embracing sleep as a critical component of your recovery routine opens up a pathway to enhanced performance and wellbeing. It's the unsung hero of mental fitness, ensuring you're not just physically prepared but mentally poised to conquer every mile.

Revolutionizing Recovery: Exploring the Benefits of Dynamic Air Compression Massage Systems
How many times have you heard the adage, “Tough times never last, but tough people do”?
While it can be true in a general sense, it does not mean that you have to live with any pain, swelling, or soreness in your muscles after every workout. Whether you’re a pro athlete, a first responder, a gym freak, or undergoing medical treatment, dynamic air compression massage can come to your rescue.
Designed especially for anyone who strains the muscles in their extremities every day, it’s a new-age technology for pain recovery and muscle rehabilitation.
Are you wondering if you should opt for a dynamic air compression massage system for recovery or warmup? Let’s look at the science behind the technology.
What is Dynamic Air Compression?
DAC, also known as pneumatic compression, is a technology that utilizes sequential pressure waves to artificially increase circulation in the body to help relieve muscle fatigue and swelling.
Extreme fatigue and strenuous physical activity cause micro-injuries in muscle fibers. While this damage is necessary for strength conditioning, it can lead to stiffness, soreness, and softness in your limbs if not mitigated.
This is further aggravated by the buildup of lactic acid as a by-product of anaerobic metabolism.
The human body is capable of recuperating, but it can be slow-going. Dynamic air compression herbal supplements the body’s natural circulation to help the heart process metabolic wastes and pump oxygenated blood into your extremities. This helps with quick recovery and relief.
You can expect your dynamic air compression massager to help with the following:
- Improved blood circulation
- Enhanced lymphatic drainage
- Reduced severity of Delayed Onset Muscle Soreness (DOMS)
- Quick muscle recovery and instantaneous pain relief
Because of these benefits, dynamic air compression massagers have gained popularity in recent years.
How Dynamic Air Compression Differs from Static Compression
You might have noticed the similarities between traditional compression therapy and dynamic air compression massages. While the similarities are undeniable, DAC is the better therapeutic choice because it's targeted and adjustable.
The pressure applied by typical compression massagers is continuous and consistent. It does not take into account the varying needs of specific areas in the body. In contrast, DAC massagers are adaptable and deliver pressure intermittently to aid muscle rejuvenation. You can treat muscles that need help without involving those that don’t.
Buy Now
Air Compression Massage Benefits: What It Can Do for Relief and Recovery
If you’re still doubtful about giving dynamic air compression massagers a shot, this list of benefits may help you change your mind.
Universal Application
DAC can be used by anyone who requires muscle recovery. This includes:
Athletes and Sports Enthusiasts
Studies have shown that DAC improves the pressure-to-pain threshold in athletes like Olympians who go through exacting training sessions. Dynamic air compression massagers allow athletes and sports enthusiasts to continue to train and improve their skills without muscle pain getting in the way.
Those who indulge in cycling, rock climbing, swimming, football, tennis, and even dancing can benefit from this technology.
Anyone Undergoing Medical Treatment
You may experience swelling, also known as lymphedema, because of existing medical conditions or recent treatment or surgery. In some instances, you may even be susceptible to deep vein thrombosis.
Because dynamic air compression massage therapy improves circulation and promotes lymphatic drainage, it can be used to treat these conditions.
First Responders and Those with Demanding Jobs
If you’re on your feet for most of the day, you may experience heavy legs caused by venous insufficiency that reduces oxygenated blood flow to the extremities. This may make your legs feel stiff and heavy, leading to difficulty walking.
Dynamic air compression massagers can aid in lactic acid drainage from the muscles and promote circulation, relieving you of heavy legs.
Versatile Use
Dynamic air compression massage systems are great for muscle recovery. But they are also great for warming up the body and waking up your muscles before you go out to play sports or training sessions.
Studies show that DAC sessions can also increase your range of motion and flexibility. So, one massager can give you dual benefits for physical activity.
Fast Action & Immediate Relief
The body takes roughly 24 to 72 hours for muscle recovery, provided you’re a fit individual who leads a healthy lifestyle and eats a nutritious diet. So, even under ideal conditions, muscle recovery takes some time.
You can experience instantaneous relief from muscle strain with one 30 to 45-minute session on a dynamic air compression massage system. It’s especially helpful for individuals who do not have the time or luxury of taking a few days off of training for recovery.
To sum it up, dynamic air compression massage does an excellent job of relieving muscles from pain and soreness. While multiple solutions are available in the market, you should choose the best air compression massager if you want to experience relief.
Why Choose Speed Hound for Relief and Recovery
Speed Hound is an FDA-approved dynamic air compression massage system designed to provide the ultimate pain relief.
The massage system has a wide range of pressure settings from 20 to 200 mmHg to cater to individual needs. This expansive range is nearly twice what its competitors offer, making Speed Hound the most flexible device available today.
The massager has two settings:
- Recovery Flush for reducing swelling in muscles
- Therapeutic Mode for pain relief or warmup, depending on your preference
It has zone toggles to target specific zones while avoiding injured or sensitive areas. The massager is also TSA-approved and comes with a travel case, so you can take it along on trips.
All customers can avail of a 60-day money-back guarantee with free return pickup if they are not satisfied with their purchase. If you continue using Speed Hound, you can enjoy a 2-year warranty with full product coverage above the industry standards.
Speed Hound Air Compression Massage price is undoubtedly a worthy investment that pays for itself with regular use.
Interested in the product or want to place an order to move more freely and get rid of muscle strain?
Are Massage Guns Good For You?
In the quest for peak physical performance and accelerated recovery, massage guns have emerged as a game-changing tool in the wellness landscape. This blog dives deep into the buzz surrounding these powerful devices, unraveling the science that makes them so effective, guiding you through selecting the perfect one for your needs, and sharing essential tips and techniques to integrate them into your fitness regimen. Whether you're an athlete, fitness enthusiast, or anyone in between, prepare to discover how embracing the power of this device can transform your recovery process and elevate your physical capabilities. Welcome to your comprehensive guide to making the most out of this innovative body recovery tool.
Introduction: Understanding the Buzz Around Massage Guns and Recovery
Lately, massage guns or also called Pro Percussion Gun have become incredibly popular in the realms of fitness and well-being, claiming to transform how we deal with recovery and muscle discomfort. What exactly is the hype about? Are these devices simply a fad? Could they be the secret to faster healing and improved performance? If you've been wondering about these matters, you've come to the right place.
The core of this fascination lies in a meaningful pledge: healing periods, decreased muscle stiffness, and a more efficient method to prepare and unwind, all packaged in a gadget that exudes seriousness. Whether you're an athlete, an exerciser or an individual managing the challenges of a typical fitness regimen, the appeal of these advantages is unmistakable. But as with any innovation that quickly gains popularity, it's essential to peel back the layers and understand what makes massage guns a tool worth considering for your wellness arsenal.
This introduction aims to unpack the excitement surrounding them, laying the groundwork for a deeper dive into the science behind their effectiveness, how to choose the right one for your needs, and strategies to maximize their benefits. So, let's embark on this journey together, exploring how these powerful devices have become a game-changer in recovery and performance enhancement for individuals dedicated to maintaining their physical well-being.

The Science Behind It: How Massage Guns Aid in Accelerated Recovery
Diving into the core of massage guns and their role in accelerated recovery requires us to strip away the hype and look at the raw science. So, let's get down to brass tacks. What's the magic behind these buzzing, pulsating devices that have athletes and fitness enthusiasts raving?
At its essence, the principle of these devices is grounded in a therapy known as percussive or vibration therapy. This isn't just a fancy term thrown around to sound impressive. It's a legitimate, researched technique that taps into the body's natural response systems to enhance muscle recovery. Here's how it works:
Increased Blood Flow: Imagine your muscles as busy highways. After a strenuous workout, these highways can get congested with metabolic waste products like lactic acid. It acts like traffic helicopters, sending rapid pulses into the muscle tissue. This stimulates increased blood circulation, effectively clearing out the "traffic" and bringing in fresh nutrients and oxygen. The result? Faster recovery times and reduced muscle soreness.
Reduced Muscle Tension: Muscle fibers can get all knotted up after exercise, leading to stiffness and discomfort. The percussive action of these devices works like a targeted mini jackhammer, breaking up these knots and relieving tension. It's like having a personal masseuse at your beck and call, ready to smooth out the rough spots whenever you need.
Enhanced Range of Motion: By loosening the muscles and fascia (the connective tissue around the muscles), these percussion therapy devices can help improve flexibility and range of motion. This is crucial not just for athletes looking to optimise performance but for anyone interested in moving more freely and with less discomfort.
Stimulation of the Nervous System: The rapid tapping sensation of a massage gun also has a fascinating effect on the body's nervous system. It can help diminish pain perception through a mechanism known as the "Gate Control Theory of Pain." Essentially, the pleasant stimulus of the massage can "distract" nerve pathways from transmitting pain signals, providing a natural form of pain relief.
In essence, the science behind them is not about brute force; it's about smart, strategic intervention. By addressing muscle recovery from multiple angles—circulation, tension relief, flexibility, and pain management—, these devices offer a multifaceted approach to wellness that supports both immediate recovery and long-term health.
Are massage guns for your well-being?
According to research, the answer is Yes," particularly when integrated into a holistic strategy for fitness and recuperation. Whether you're challenging yourself in sports, working out at the gym, or just managing the pains of life, adding a percussion therapy device to your recovery regimen could make a significant difference.

Choosing the Right One: Factors to Consider When Selecting a Massage Gun for Your Needs
Alright, let's navigate the bustling marketplace of Pro Percussion Gun together, aiming to pinpoint the perfect match for your recovery needs. Imagine stepping into a world where every shelf and online store is crammed with these high-tech tools, each promising to be your ultimate ally in muscle recovery. The question is, how do you choose the right one without getting lost in the sea of specs, features, and flashy marketing?
Here's a straightforward guide to cut through the noise and find the massage gun that feels like it was tailor-made for you:
1. Power and Speed: Not all muscles demand the same level of intensity. Think of your massage gun as a versatile chef capable of cooking up everything from a delicate soufflé (gentle muscle activation) to a hearty stew (deep tissue work). Look for a device that offers a range of speeds and power settings. This versatility will ensure you can adjust the intensity to suit different muscles and recovery needs.
2. Battery Life: There's nothing more frustrating than gearing up for a soothing muscle massage, only to find your device dead as a doornail. Opt for a massage gun with a robust battery life. A good benchmark? Aim for a model that can sustain several sessions on a single charge, ensuring your muscle recovery doesn't get interrupted by constant recharges.
3. Portability: Whether you're a gym-goer, a traveller, or someone who enjoys the occasional outdoor workout, the convenience of portability cannot be overstated. A compact, lightweight massage gun means you can bring your recovery tool wherever life takes you, ensuring you're never left stiff and sore after your adventures.
4. Noise Level: There's a thin line between a massage gun and a device that sounds like a construction site on a quiet morning. Seek out a massage gun that whispers its healing powers rather than shouting them. A quieter model will allow you to relax and enjoy the recovery process, whether you're in a serene home environment or need a quick session in the office break room.
5. Attachments and Accessories: Different muscle groups and recovery phases might require different approaches. A massage gun that comes with a variety of attachments (like balls, wedges, and cones) gives you the flexibility to target specific areas with the most effective shape. Think of these attachments as your toolkit for personalised muscle therapy.
6. Durability and Warranty: Finally, a massage gun is an investment in your health and well-being. Look for one that's built to last, with solid construction and a warranty to back it up. This ensures that your trusty recovery companion will be by your side, ready to tackle muscle soreness, for many workouts to come.
Conclusion: Embrace Quicker Healing and Enhanced Performance with the Power of Massage Guns in Your Wellness Arsenal
As we've explored the realm of massage guns, delving into their support and offering advice on how to make the most of them, one thing is evident: these impressive devices go beyond being a passing fitness trend. They signify a shift in our approach to recovery and improving performance. When you add a massage gun to your wellness toolkit, you're not just purchasing a piece of gear; you're making an investment in your body's capacity to recover swiftly, excel in activities, and handle the demands of your workout regimen.
Embrace the change and let the percussive therapy work its magic, transforming your recovery process and elevating your physical capabilities to new heights. Whether you're an athlete pushing the limits, a fitness enthusiast looking to optimize your workouts, or simply someone navigating the everyday demands on your body, a massage gun can be your ally in achieving quicker healing and enhanced performance.
Remember, the key to unlocking the full potential of this innovative tool lies in thoughtful, consistent use tailored to your body's needs. So, take the leap, incorporate it into your daily routine, and watch as you reach milestones in your wellness journey you once thought were beyond your grasp.

How Kate used recovery technology to complete 17 hours of cycling for 17 days
Written by Kate O, Trek athlete from New Hampshire
I have always been one to do things to the extreme, so it was no surprise to my family when I wanted to cycle across America. For all of my adult life, I have been very active to the point where I didn’t know how to sit still and enjoy quiet time. I was running almost every day, doing CrossFit five days a week, and rock climbing 2 to 3 times a week. I was always injured, preventing me from having a consistent routine with my training. As with everything in my life, it was all or nothing. I was either training really hard, or I was trying to heal.
Three years ago, I started to look at my way of doing things in my training, wondering what was missing. I stopped doing CrossFit. I stopped running. I stopped rock climbing and picked up cycling as it was less impactful on my body and joints. As you can imagine, I took cycling to the extreme as well. Every chance I got, I was on the bike and always looking for the next challenge. My low mileage quickly turned into high miles, and two months into cycling, I had already determined I wanted to cycle across America. I was going to give myself a year to prepare.
Having surrounded myself with highly successful and qualified athletes, I began to notice that many of them took time to recover. Recovery showed up in many different ways for everyone. I started to experiment with all of these ways, as I didn’t have recovery as part of my training. This was a huge game-changer for me! A dear friend, coach, and highly achievable athlete gave me some compression boots to try. This brought recovery to a whole other level for me as an endurance cyclist. This was a significant part of my training to be able to complete the Trans American bike race. It was the year that many events were not held due to the uncertainty of the pandemic. Therefore, I moved my 4200-mile ride to my trainer, riding all of the GPX files to its entirety all the way to the end.
I rode my trainer 17 hours a day with four hours of prepping for the next day and focusing on my recovery. That recovery schedule/routine included falling asleep in my compression boots. At the end of the day my legs felt and looked swollen. Having a few hours of sleep each night with my recovery boots, allowed me to feel ready for the next day. Every morning, I was able to get back on the bike and ride for 17 hours. I did this for 17 days! I could not have done this without proper recovery. My compression boots were a big part of that proper recovery. Since then, I use my recovery boots every day regardless of whether I have a strenuous workout or not. It’s great to use them everyday, as sitting at a desk (or on a plane) is not healthy and is bad for circulation. Being constantly on the go is another great reason to use them as this forces me to sit down and give me some much needed relaxing time. When I am traveling and cannot bring my compression boots with me, I do feel slower recovery with my training and have poor sleep numbers.
Having these boots as part of my recovery ritual has made a huge improvement in healing throughout my body. Not only does it help with healing, but it also allows me to sleep on a more restorative level. This is a metric that I like to keep track of, and I do this with my Garmin smartwatch. I look at a few numbers to track this progression, not just one. I use my Resting Heart Rate (RHR), Heart Rate Variance (HRV) as well as my sleep stages. I have been tracking these numbers for over 4 years now, I can pretty much tell you what they are going to be before I even look at my watch data.
Having tracked these numbers for so long, I do notice a difference in my sleep numbers and how I feel when I am traveling without my compression boots versus when I travel with my compression boots. Therefore, I make it a point to try as hard as I can to bring them with me whenever possible; they are easy to bring as a carry-on. They fit very nicely under the seats or above in the compartments. Compression boots have been a great investment for my health, as well as my recovery, and I see gains in all aspects of my health.
Recovery is often overlooked or even the first aspect of training that is “let go” or not made a priority. What most people do not understand is that it is THE most important part of training!


Benefits of Compression Boots for Athletes and Fitness Enthusiasts
Welcome to the world where recovery meets innovation—where every athlete and fitness enthusiast finds their secret edge. In this blog, we dive deep into the transformative world of compression boots, the unsung heroes of recovery and performance. From understanding the cutting-edge technology behind compression boots to exploring the top reasons athletes swear by them, we've got you covered. We'll also reveal how this technology can elevate your performance and prevent potential injuries, wrapping up with actionable tips to incorporate them into your recovery routine. Get ready to turbocharge your recovery and step up your game with insights from Speed Hound.
Introduction: Understanding Compression Boots and How They Work
Ever wondered why some athletes and fitness buffs seem to have a secret weapon for bouncing back faster and stronger? Enter the world of compression boots, the game-changer in recovery tech. At Speed Hound, we're all about leveraging your body's innate superpowers. Imagine this: every time you work out, your muscles are in a marathon of their own, breaking down to build up stronger. But here's the catch – they need a pit stop, a way to refuel and rev up. That's where our compression boots strut in.
Our body recovery system isn't just another piece of equipment. Think of it as your pit crew that uses dynamic air compression to kick your body's venous return system into high gear. This means more than just squeezing your legs; it's about mimicking your body's natural rhythm, flushing out lactic acid and other metabolic wastes, replenishing with oxygen-rich blood back to your muscles while whisking away the fatigue. Picture it as a relaxing massage, but one that works as hard as you do, preparing your muscles to hit the ground running, lap after lap.So, why do athletes and fitness enthusiasts swear by our compression boots? Because they're not just wearing boots; they're strapping into a recovery rocket, ready to launch their performance to the stars. Ready to find out how? Let's dive deeper.
Top Reasons Why Athletes and Fitness Enthusiasts Swear By Compression Boots
Why are compression boots the secret handshake among the fitness elite? It's simple. They're not just boots; they're a badge of honour, a testament to pushing limits and smashing goals. Here's why:
Rapid Recovery: It's like hitting the fast-forward button on your body's recovery process. Athletes don't have time for downtime, and these boots ensure they're back in the game faster than ever.
Peak Performance: When your muscles are treated to a VIP recovery experience, they pay it back in strength and endurance. It's not magic; it's science, and it's spectacular. Users often report feeling more prepared and energized for their next workout, attributing their improved performance to quicker, more efficient recovery periods.
Injury Prevention: Think of compression boots as your bodyguard, shielding your muscles from the aftermath of intense sessions. By enhancing blood flow and increasing range of motion, they keep the common culprits of overuse and fatigue at bay, letting you train harder and smarter.
How Compression Boots Can Enhance Your Performance and Prevent Injuries
In the universe of training and fitness, every athlete hunts for that edge, that next-level gear to boost performance and dodge injuries. Compression boots? They’re the hero gear you didn’t know you needed. Here’s the scoop:
Supercharged Performance: Imagine every workout powered by fresher, less tired muscles. That’s the gift of compression boots. They prep your muscles for the spotlight, ensuring each session, run, or game feels like you’re bringing your A-game, thanks to optimal blood flow and oxygenation.
Fort Knox for Muscles: Injuries can plaque even the most seasoned athletes, derailing dreams and goals. Compression boots build a fortress around your muscles, safeguarding them against the sneak attacks of strains and overuse injuries. It’s like having a personal trainer focused solely on keeping you in the safe zone.
Consistency is Key: Peak performance isn’t about one-off wins; it’s about being consistently great. Compression boots are the silent partner in your training, ensuring you’re not just ready for today’s challenge but all the tomorrow too.
Conclusion: Step Up Your Recovery Game with Compression Boots Today!
And there you have it—your not-so-secret weapon in the relentless pursuit of fitness excellence. Compression boots aren't just a piece of equipment; they're a commitment to pushing boundaries while protecting your most valuable asset: your body. At Speed Hound, we're all about that next level of training and recovery, making sure every athlete can rebound quicker, perform better, and stay in the game longer. So why wait? Step up your recovery game with compression boots today. It's time to give your muscles the VIP treatment they deserve and keep those fitness goals within striking stride.